Sunday, 10 April 2016

International Space Station (ISS) followed by Dragon spacecraft (CRS-8)


The history in space exploration is being written everyday, two days ago another success was achieved. Most likely everyone meet the news here or there, SpaceX successfully landed the first stage of the Falcon rocket onto a floating platform. 


We rarely see from London, if a cargo ship begins its hot pursuit to catch up with ISS. Well not this time ;)
I do image ISS from time to time, first I used a SW 200/1000 newtonian scope with a Canon 600D, then a SW Skymax 90/1250 maksutov and now a 127 maksutov teamed up with a Zwo ASI 120MC planetary camera. It is giving me a bit of a hard time as I struggle to find good settings with an ASI camera.

Setup is ready, wonderful sunset at the background
Anyway I went to a nearby open park to gain some more experience on how to capture ISS, every attempt gives me further reference points, what gain and shutter I should use. I knew Dragon might be visible, but probably only for the camera lens, not to my eyes.

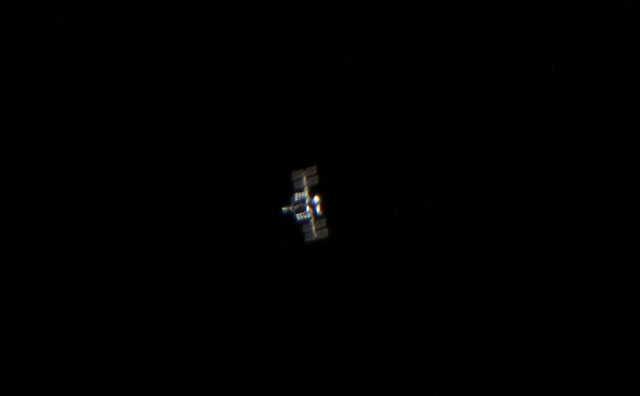
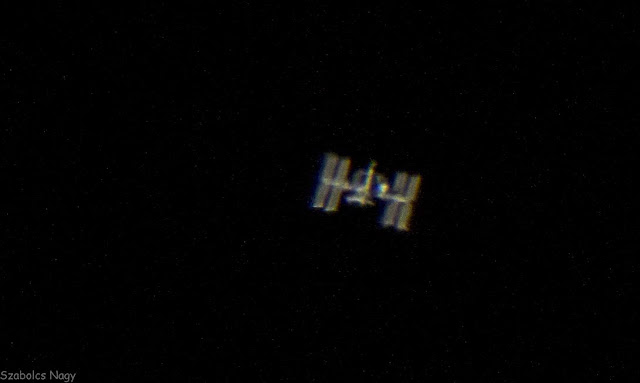
So did my setup, waited for ISS to appear and began shooting my video. Below here is my best shot if the station, panels are reflecting a little amount of light, mainly the truss, the coolers, Columbus and Kibo labs, Zvezda, Zarya and Unity and Destiny parts are visible. 


International Space Station (ISS)


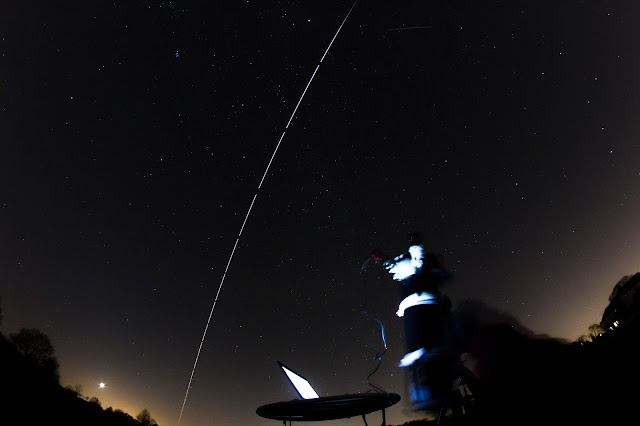
I kept my 600D clicking (with a Samyang 8mm fisheye lens on it) whilst I was busy with the ISS close up. I knew (from spotthestation.nasa.gov website) that Dragon will follow ISS within about a minute gap behind. But honestly I did not expect it to get as bright as it was.


ISS, Drgaon, Jupiter and Moon


So I stopped recording ISS, quicky set gain higher and started pointing my scope toward the Dragon spacecraft. I didn't know what to expect, I've never attempted to image such a small object travelling quite quickly. Here are the best two frames, One looks spherical (on the left) - similar to the front end of the cargo ship. But still pretty unsure what part of it is illuminated, sadly the solar panels remained hidden. I was hoping that at least those will be illuminated, which could make the identification a lot easier for sure. 


Dragon (CRS-8) cargo supply spacecraft


Courtesy of  SpaceX


Wednesday, 6 April 2016

De-rotated Jupiter

After reading a few astronomy related forums on the web, I had to realize that some planetary imagers actually do de-rotation on Jupiter image processing.
It got stuck in my head and was planning to play with the idea a bit.

Last night we were gifted in London with a superbly clear sky, so it seemed like a perfect opportunity to try this new idea out.

So I took one 5 mins long video - yes 5 minutes!! :) The golden rule is we never go over 90 sec because of the planet's rotation. But using WinJupos you can break this rule. Like everything, this method has advantages and also disadvantages too.

On the bight side it gives more details and an overall better looking to our final image. The picture below clearly represents the huge difference between a stacked image in a regular way from a 90 sec video and the one from a 5 mins long video. 


comparison of de-rotated and simply stacked images


If I have to mention any downside of this processing method is probably the less sharp edges. That is an obvious result as the planet rotates, we can only "enhance" the middle region. But I am already convinced by WinJupos, with some careful post processing it makes the end result look more pleasing, more detailed and maybe smoother too.


Method

I cut off a 1000 frames chunk out of the whole video, ideally somewhere from the middle area and stacked it in Autostakker 2 (AS2!).
Then opened up WinJupos and made a measurement file from the stacked photo I just created form that 1000 frames.
Then open "Tools" in menu and "De-rotation of video streams"....
Open the original video and add the measurement file to the requested section. Basically that's it. You run the process and once you've got the de-rotated video, you stack it as you would normally do in AS2!. 

Sunday, 3 April 2016

Imaging ISS -part 1 (with dslr)

This is a subject that has a growing popularity these days - which is a great thing. The International Space Station is not only the most expensive project we've ever built, but it hosts countless important experiments and gives us an accurate feedback, what is it like to live in a microgravity, how things, materials act in space, etc.
Since I discovered it's "existence" I am a huge fan of the ISS. If weather permits, I always go outside and follow it just with naked eye -  every time I see it - even these days - I am still super fascinated.

Since I own a telescope and saw some of the photos of professionals such as Thierry Legault - I had that inner feeling that I should attempt to do the same.

At the beginning I used my Skywatcher 200/1000 newtonian scope on an eq5 mount - not ideal mount for this purpose but with a little practice it is feasible... Also for imaging a Canon 600D did the job. Was a bit confused which way to go, taking images or videos and use the frames.
I've tried both with mixed results, but I must say single RAW images proved to be the way forward if you use dslr. Unfortunately London does not treat me with too many clear skies, especially when ISS comes so the opportunities to practice are rare.

If you try and fail, well fear not, you're not alone :) It is a very challenging way of imaging a fast moving, very small object in the sky. Need lots of practice, accuracy and lots of patience. But when you nail it - well you'll be the happiest person on the globe at that very moment :D

Where to start?

This is the most important question of all for sure.
I would say these are the most important steps you need to do before you even thinking about pressing the dslr shutter release button:

-  Most importantly download any of the smartphone apps (ISS detector for android and Sputnik for iOS), these apps will tell you the brightness of the station, where it is coming from (from UK always west or south west), the elevation (how high it climbs up in the sky), at what time and how long the whole event will last. Crucial to have these information!! If you use pc mostly, then open http://www.heavens-above.com/ or https://spotthestation.nasa.gov/ and it will tell you accurately the same info.

-  Once you know when and where to look, do you setup as you would. The only difference is that you won't track the sky this time, you don't need polar alignment or such. Instead try to position you mount so, that you can track the path of the station the smoothest by moving the scope manually. Using the app on field and knowing the elevation of the ISS, it should be straight forward.
Mind that ISS is the closest when it passes nearly ahead!

-   I always track the station MANUALLY. Yes by moving with hand. I'm sure this whole process could be motorized, some enthusiasts build their own equipment. Sadly I'm not a technical guy, definitely not some who does DIY too often, so I rather track ISS manually and do the rest with help of dedicated software.

-  Finder scope and the main scope need to be aligned, so whatever you see in the finder should appear in you main scope. You do this first visually, than you insert your dslr and do the alignment again. At this point I should state, that I don't really look through the finder scope, I found it way to hard to keep ISS in the finder's FOV. Instead I rather stick with red dot finder / Telrad (I use Telrad), it proved to be a better and more efficient way to me. But you need to find out which way works for you the best.

- To set camera settings and focus, another crucial step. If one of this two is set incorrectly, all your frames will end up in the bin. Check the max brightness of the station (visual magnitude) and try to find something similarly bright on the night sky. I use normally whatever I can, Moon or planets. If non of these present, than find the brightest star, check it's brightness and do and estimate with you settings. On my 200/1000 with a 2x barlow inserted, at mag -3.0 (or near) - my settings were normally ISO 800 or 1600 with sutter at 1/1250 or the nearest up or down in your settings (on a Canon 600D). These settings only apply if you shoot RAW images. Video settings are slightly different.... best to do a few experiments on that, mind that you should use high shutter rate - otherwise ISS will trail like stars on long exposure shots, we don't want that.

Okey these are the main steps, if any of these above are set wrong - the punishment will come... probably that's why this task is so hard, very easy to do a small mistake and it's over. Few times I did all the setup required, few minutes before the pass I double checked sharpness ( to do so I changed shutter speed to see the star and focus on it). But I got busy checking the app and other stuff, so I simply forgot to put the shutter speed back to where it supposed to be set. I let you guess what happened afterward... angry me. :)

Tracking

Manual tracking is the way forward for most of us. If everything is dead accurately aligned, you start following ISS by looking through your finder / red dot finder / Telrad (any of these, whichever works for you the best). It will give you sweaty moments I can guarantee, but it is so much fun.
You don't need to worry about your camera, as long as ISS is in the FOV it will be recorded by your dslr. Some keeps pointing the scope a bit before the ISS on the sky and let ISS fly through the FOV - I personally always try to track it, so basically moving the scope with ISS.
You'll need a remote shutter release (cable preferably), set your dslr on continuous mode.
My Canon 600D isn't capable of reading images as quickly onto the SD card as higher end cameras. What happens is basically after taking 10(ish) shots, clicking will pause (camera needs time to write those photos onto the SD card) and it won't continue at least for a few more seconds. Than it starts again but soon it will need some time again because the RAW files are simply too big. My camera just can't keep up with the writing speed. It is really annoying, because you loose precious time when ISS is bright and close, but the camera keeps hesitating...
So probably that is the reason why I went down to another road, using planetary camera and a laptop - but that will be the subject of another blog post :)


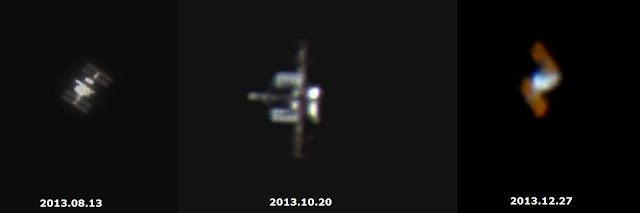
Here are some of the early photos I took. You'll see how my skills got better over the time. But I sill love one of my first shots which looks like a bunny on ski :D


Another way to photograph ISS is using the camera (dslr) and a wide(r) angle lens. Taking multiple shots set to 5/10/15/20/30 sec shots and layer them in Photoshop or GIMP.
Maybe a bit less challenging but with a nice background you can make a fantastic composite photo (see photos below).

Taking RAW images
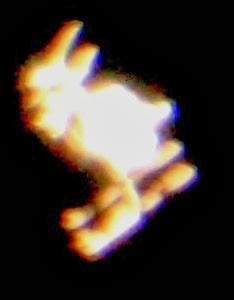


My very first ISS image - the Rabbit :)
(2013.06.08)


Slow improvement after a few attempt


One of my ISS shot using a Canon 600D
(2014.10.19)


Using video frames


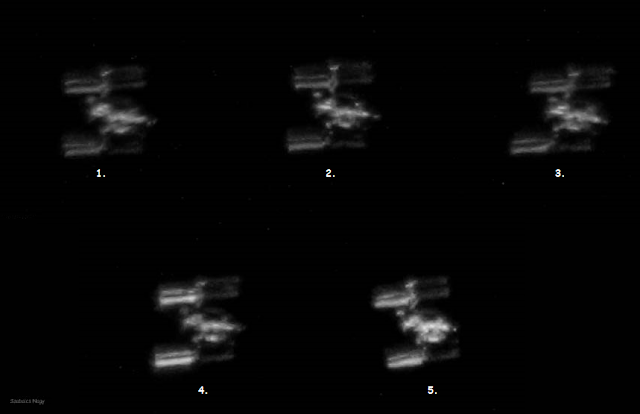
Few frames of a video
(2015.08.01)


Quite a few features visible - possibly a docked Progess too
(2015.08.09)


Composite photos


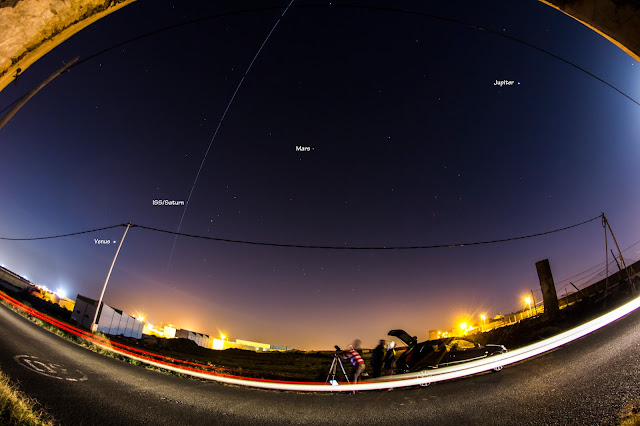
Composite ISS over head pass whilst I was taking close up photos
(2016.02.10)


ISS transiting Saturn - captured through an 8mm Samyang fisheye lens


Photos

All my ISS photos are here
https://www.flickr.com/photos/metrolinaszabi/albums/72157649038551639/with/19818768563/


Friday, 1 April 2016

Jupiter imaging - Skywatcher 127/1500

Last night I visited the Northolt Branch Astro amateur group, we got together to do our hobby, imaging the wonders of heaven.
As I only do imaging from my balcony, due laziness and lack of trust in my power tank - so this was a great opportunity to test my Skywatcher 127/1500 maksutov scope.

I recorded 6751 frames, histogram at 52%, gain 79 and shutter 17.36 ms.  I must admit that mostly I stick with a value around 40%, but yesterday I was in an experimental mood... did not regret it at all.

The best 3500 frames, because seeing was quite okey and the quality of the frames seemed good too. I have tried stacking the best 1500, 2500 and 3500 frames. The third option turned out to be the way forward.


After stacking in Autostakkert 2


Final result

Still lots to do with the photo. In Registax I used Wavelets to get the right sharpness, getting rid of the false colour and align the RGB channels. Bit of gamma modification and save.
Then in Photoshop it only needed a final touch to fine tune the details.
Io was getting closer to Jupiter and the actual occultation happened at 22:20, 20 mins after this shot was taken.


Jupiter in motion - 4 frame animation 


Overall conclusion:
Skywatcher 127/1500 mak is a stunningly good scope under good seeing conditions (seeing was 4 and 2 according to meteoblue - that website gives two values for seeing, max is 5 in both categories).
Hard to find the exactly good settings, but once you do it does miracles - mind this is still a fairly small scope.

It does embarrass bigger scopes for sure :)

Location

London - Northolt

Equipment used
Skywatcher 127/1500 MC
Zwo ASI 120 MC colours camera
Celestron 2x X-Cel barlow lens

Software used for processing:
Autostakkert 2
Registax 6
Photoshop


Update


In WinJupos I attempted to do derotation of three stacked images, here is the result compared with the best single frame (stacked of course as described above).
One stacked frame has probably slightly more details, but in the same time noise is a bit too much. Versus the derotated version - less details but probably more pleasing to look at it.

Thursday, 31 March 2016

After a long long hibernation I re-start my blog - lots happened during this long brake.
I'll try to catch up with some of the events lately happened to me :)

Few days ago a big new came, not one but two amateur astronomy photographer caught a meteor/comet exploding into Jupiter. What a great luck they had, amazing videos showing a very bright flash of light on the right hand side of Jupiter.

I'm sure that many of us started watching the older footages for some great discovery, including me.
Well no such things happened on my videos sadly, the only thing I found is a bird of airplane :D


Friday, 25 March 2016

ASI 120 and 0.5x focal reducer test

Here is my beloved 127 mak with my also beloved 120MC camera :)
A scope with such a long focal length like this makes hard to use it for some things I also like. Such as ISS/airplanes transiting the Moon/Sun, also occasionally I take photos of planes as well. So I bought a no name focal reducer to see how does it perform with my equipment.

First test was a huge success, took some time to figure out the know-how but the photo of a Lufthansa Cargo plane ensured me that this is the way to go forward ;)

Now I can't wait to test it on a Moon/Sun transit of ISS :P


Lufthansa Cargo plane


This photo (below) I took of a nearby aerial, just wanted to see the real difference in FOV. It seems to work so far without loosing sharpness or any other details as you can see the photo of a Lufthansa Cargo plane... nice and clear as it should be. 


I took a shot of a nearby aerial with and without the reduce

Friday, 18 March 2016

Montes Apenninus area

Montes Apenninus

The enormous mountain to left from center is Montes Apenninus, illuminated superbly by Sun giving a good look and nice contrast.
To the left is Mare Imbrium (Sea of Showers or Sea of Rains) and to the right Mare Serenitatis (Sea of Serenity) - two huge seas. Maria (seas in latin) are covering 16% of Moon's surface, mostly located on the near (visible) side. They are basically large, dark, basaltic plains, formed by ancient volcanic eruptions.
The early astronomers named them this way, because they assumed to be actual seas.


"Montes Apenninus are a rugged mountain range on the northern part of the Moon's near side. They are named after the Apennine Mountains in Italy. With their formation dating back about 3.9 billion years, Montes Apenninus are still relatively young.

This range forms the southeastern border of the large Mare Imbrium lunar mare and the northwestern border of the Terra Nivium highland region. It begins just to the west of the prominent crater Eratosthenes, which abuts against the southern face of the range. To the west of these mountains is a narrow gap where Mare Imbrium in the north joins Mare Insularum to the south. Further to the west are the Montes Carpatus mountains."

Wikipedia


Equipment

Skywatcher 127/1500 maksutov (MC) scope on an eq5 mount
For imaging - Zwo ASI 120MC planetary colour camera