Since I bought my first scope - a completely hidden world revealed itself to me.
I image the members of our Solar System, the International Space Station (ISS), also airplanes/ISS transiting the Moon/Sun/planets - so basically everything that is not on planet Earth :)
I was a keen blogger for a relatively short period of time, it was great to write down all those early experiences into a blog. Now that I revisited it after a long period of time, it was fun to read back some of the posts.
Some things has changed during this 2 years, mainly that I have created a website and most of my work is posted there now. I do only limited amount of planetary, solar and lunar imaging lately, so my focus narrowed down to manually tracking and imaging the International Space Station. Luckily I have managed to make some equipment improvements and now possessing a set that work perfectly for just that.
Please visit my website for my latest photos, animations and videos of the International Space Station.
In 2016 I’ve been at the Astro Camp
organized by the Hungarian Astronomical Society in Tarjan. Two astronomers gave me 3 solargraphs, one I gave away for a good use to Northolt
Branch Astro, one was a test and this one.
The solargraph was put out on 30th
January 2017 at Wimbledon Common at the windmill facing toward the Ranger Office.
I really didn’t know what to expect from this project as this was
my second solargraph in real use. It’s been collected on the 7th
June and made me so curious, what I might find inside the enegy drink
can.
Here are some photos about opening the
can containing the photo paper.
But what is this thing called solargraph??
Well it is a very simple photographic
camera for taking very very long exposure wide angle photos with a pinhole camera.
You use a box or a can, cut the top 1/3 off and put a light sensitive
photo paper inside. So the paper is taped to the inner side of the
can, whilst you make a whole onto the opposite side of the can, hopefully ending up with the pinhole camera.
After the paper carefully placed
inside, taped at the top to hold it at a fix position, we close the
can and tape it around to seal it from water, humidity etc. It is
that simple.
But I have never made one myself yet, but definitely will in the future because solargraph is a lot of fun!!
But let's see the result of 127 days of waiting. The original photo that came right out of the can is on the left. The one on the right is post processed in Photoshop.
And finally this is a video summary about the whole project. Couldn't document as professionally as I planned, but let's say this was the first step on this long road :)
This is a very special post for many reasons. I've been imaging the International Space Station for years now and it usually takes time to get used to the new astronauts - at least to me. Thomas Pesquet is one of the really cool ones in my opinion, he was heavily involved in science (just like the others of course) and he was/is a great ambassador for space travel, science and astronomy during his stay on board the station.
How cool is the fact, that whilst I am writing this blog post, I am also watching Nasa Tv showing Thomas and Oleg as they have just landed in Kazahstan and making their way out of the landing module.
Last night was a promising night with two very bright ISS pass, a possible SpaceX Dragon supply vehicle launch and some proper deep sky observation too.
Second over head pass details and star chart
Sadly the Dragon was grounded due weather circumstances, which wasn't the best news as I really wanted to give a try on imaging at 3000mm focal length. Next time I guess....
The first ISS pass happened just a little bit before 10pm, part of the sky was still fairly bright so I didn't give time lapse imaging much chance yet. The close up shots didn't give me the results I was expecting, but it was still an amazing experience to see it and show it to friends and their neighbours. They loved it!
Sometimes I have problem with imaging, nobody said this is walk in the park though. Occasionally, despite doing the exact same drill as usual the result is just not coming.
But remaining determent and keen on trying to achieve my best mostly pays off - sooner or later.
The second pass went up to 59 degrees of elevation. You can see the screenshots saved from http://www.heavens-above.com/. They always give a very accurate prediction of the expected illuminated ISS passes.
Second over head pass star chart
As prediction showed, ISS was passing above Moon, Jupiter and even Arcturus too. Timing was super accurate as always, so decided to keep taking 30 second expos and made a composite photo with the individual frames to make its full pass visible.
Composite shots, one with ISS only and the other only with star trails as well
This is a video footage - kind of a summary about the night
Whilst the camera was clicking, I was busy with preparing my Skywatcher 250/1200 Flextube dobson scope for close up imaging.
It went fine, quickly sorted out the good frames with PIPP in ISS mode and later, running through all the frames I had to realize the success. It always feels amazing, when some kind of details reveal themselves, parts like the Cupola, BEAM, Leonardo module, Kibo and Columbus modules etc.
Sequence of the best frames taken with telescope
Best shot with most details
Once the ISS buzz was over, I let my camera continue taking photos looking north-east direction. In the meantime - for the first time I could test my 10"dobson under clear sky with no light pollution.
After we did the most visible object - moon, Jupiter and Saturn - my hunger was huge for deep sky objects.
So I started with Albireo, a wonderful double star. Then hopped onto M57 Ring nebula, M13 Hercules cluster, Mizar double star and eventually M51 Whirlpool galaxy.
Well M51 really blow my mind!! I expected one faint fuzzy ball and that's it. Instead I saw faintly the spiral arms of the galaxy too... no words really. Not bad - just think about it, that object is approx. 23 million light-years away. Really left me speechless.
A bit of spinning with planet Earth
Equipment:
Skywatcher 250/1200 Flextube scope on dobson base
Zwo ASI120MM camera
Zwo Red filter
Televue 2.5x powermate
First of all I must begin with the fact, that 2017 was a disappointing year so far in terms ISS close up imaging. Whenever I had time and had bright overhead passes, weather treated me poorly, never really helping me to achieve my plans.
Especially now, when finally I have a good equipment for this particularly special area of photography - a Skywatcher 250/1200 Flextube telescope on a dobsonian platform. Also I got rid of my color ASI12MC camera, instead I use the mono 120MM version with filters, particularly red filter for ISS.
But eventually the heavens opened up for London in the past few day, warm temperatures and absolutely perfect clear sky was our present after all the bad weather.
So I decided to do an ISS marathon - at least a few attempts on high magnification ISS imaging. Due work I couldn't stay up till morning, so I did the ones around midnight.
I had one over head pass on the 25th May 2017 at 11:15 pm which was at 64 degrees of elevation at its highest point, this was the period when the station was relatively at closest to me. The result was pleasing, despite the odd angle the Sun illuminated ISS - basically pretty much from sideways.
I managed to identify a few little details on the station, such as the Cupola, BEAM (Bigelow Expandable Activity Module) and the Canadarm 2 robotic arm. To be honest my main goal was Cygnus-7, I've marked its position but I'm not entirely convinced if visible.
Before ISS pass I collected a few frames of Jupiter through Zwo Red filter
The second attempt happened on 27th May 2017 at 0:36 am, similar pass at 68 degrees of elevation, ended up nearly with the same photo, slightly more blurrier than the first attempt. Probably it is less overexposed, Leonardo module, Cupola and BEAM are less bright so easier to identify. I wanted to catch a much higher over head pass too, but I found a better challenge and chose that instead...
Comparison of the two shots taken at nearly same circumstances
Because not too far from my location there was the ISS Jupiter transit opportunity. The gas giant was nearly 34 degrees above horizon, the predicted transit time was at 10:22pm when the International Space Station was roughly 700km from my location.
Probably the toughest task was to make the decision about camera settings. Only rarely happens, that the current visual magnitude of ISS (at the exact time of transit) matches the other object's visual magnitude. This one wasn't one of those rare occasions sadly, the station was so much brighter (even if it doesn't seem to be a massive magnitude difference), that I couldn't avoid slight overexposure. But this seemed to be the borderline based on experience from previous night. So in Fire Capture I set expo to a value of 0.88 ms time and gain for 55.
First here is a time lapse video taken with my dslr (Canon 600D and a Samyang 8mm fisheye lens). I have to say it was tremendous fun to see ISS rising and approaching fast toward Jupiter. The transit seemed so unlikely at first sight, but the prediction was (obviously) correct and eventually took the right direction. I tried to watch the event with naked eye and also keep an eye on the laptop screen too.
Phenomenal experience, highly recommended to anybody - even with naked eye. The sheer accuracy of the prediction blows my mind every time I witness it.
ISS near Jupiter pass
The gif above shows the actual close pass. It is a real shame, that I couldn't find a place on the centreline, this could have been a nice ISS transit - I mean as good as it can be from UK at this relatively low elevation. Mind this is approximately the real speed of the event. I never work with the raw video directly, instead usually brake the video down into frames and after post processing those frames, I make a gif from them. This way I can enhance the frames slightly, getting rid of some noise if possible and make all the necessary general improvement (contrast, brightness, etc.).
My scope has 1200mm of focal length (FL), which usually isn't the best magnification for close ups so I use a 2.5x Televue powermate to get the right magnification level. But due my inaccurate position from centreline, I did't want to risk missing ISS completely. Therefore barlow option ignored and went for prime focus instead. This way I could avoid any failure - believe me there is nothing more frustrating than missing ISS because your field of view is too little. It happened to me at a few lunar and solar ISS transit, so kind of learned my lesson.
Composite photo of the near pass
And finally here is a funny shot, another composite from the time lapse. Playing wizard with ISS wasn't planned at all. At home I was laughing out loud , when I discovered the possibility of a cool composite shot.
I've seen many of the planetary imagers working with mono cameras, which can give stunning results over the color ones. Therefore I have purchased a brand new Zwo ASI 120MM monochrome camera and a second hand manual Zwo filter wheel with LRGB and IR pass filters.
Just learning WinJupos in depth now, what's already clear is it won't be walk in the park. But that's exactly what's giving me extra motivation for sure....
Weather has been a genuine disaster in 2017, I had one good night for imaging Jupiter, but the strong jet stream took away all the finer details.
Here is where I am right now, the best few shots of Jupiter so far. I have to say not as good as ones taken with the 120MC color version, but hoping for improvement both in image quality and weather.
Ezuttal a PIPP nevu csodas programrol szolnek par szot, igen sokoldalu szoftver melynek oriasi hasznat latjak az amator csillagaszok. Rettentoen jol dolgozik es egesz konnyu kiismerni, elsajatitani az alapokat.
Jomagam leginkabb objektumok kozepre igazitasara hasznalom. Legyen ez bolygozas vagy ISS fotozas, ha eleg frame (kepkocka) all rendelkezesunkre, tokeletes celt szolgal, kifejezetten akkor ha a mechanikank nem koveti a cel objektumot pontsan, magyarul ossze-vissza maszkal a kepernyon. Esetleg valaki ugy bolygozik, ahogy en szoktam, barmifele polusraallas nelkul.
Tovabba ha nincs egyatalan semmilyen motoros mechanikank, ebben az esetben kicsit osszetettebb a feladat de igy is viszonylag egyszeruen elkeszithetoek a stackelt bolygo fotok.
De hogy ne menjunk egybol bele a bolygozas technikai reszleteibe, inkabb egy egyszeru repulorol keszult videon szemleltetnem a szoftver tudasat.
Az alabbi video par napja keszult, a Lufthansa egyik Boeing 747-ese huzott el London folott. Vagatlan, eredeti felvetel.
Nem rossz, de azert nem is jo, valljuk be eleg elvezhetetlen a felvetel. Hogy ebbol mi mindent lehet kihozni, ime....
A PIPP megnyitasa utan ket fele modon nyithatjuk meg a video fajl.
1. File menupont alatt Add Source File
2. Source file fulre kattintas utan egyszeruen behuzzuk a fajlt (drag and drop)
Miutan ez megvan, a Processing Options fulre kattintsunk.
1. kep - Processing Options
Az ablak jobb feleben levo lehetosegek kozul mindenkepp legyen bejelolve
- a Frame Stabilization Mode lehetosegei kozul az Object/Planet
- az Object detection
- Object detection Treshold (errol bovebben a kovetkezo pontban)
- Center object in each frame - minden erzekelt objektumot kozepre helyez
- Cropping - kozrulvagas, nem feltetlenul fontos, de en hasznaltam
Object detection Treshold
2. kep - Auto Object Detection Threshold
A fenti ket foton lathato kis ablakban jobb oldalon a detektalt terulet lathato, melyet pirossal emel ki a progi. Az elso kepen autora van allitva es lathato, hogy nem igazan kepes erzekelni a repulot, az egesz frame piros szinu. Erdemes jatszogatni a lehetosegekkel, miutan az Auto Object Detection Treshold opciot inaktivaljuk (pipa eltuntet) es mi adunk meg erteket. Nekem ebben az esetben 100 volt a megfelelo ertek, a masodik kepen latszik hogy csak a repulotest es a kondenzcsik maradt piros, magyarul a kozepre helyezes soran erre fokuszal az algoritmus.
3. kep - Output Options
Ha ez megvan, irany az Output Options ful, ahol tetszolegesen kivalaszthatjuk, milyen formatumban szeretnenk elmenteni a vegeredmenyt. En ebben az esetben AVI-ban mentettem, de kepkockakra lebontva is elmentheto a video ami ISS kozelik eseteben a fonyeremeny :)
4. kep - Mentes
Miutan hagytam a PIPP-et dolgozni, ez a video lett a majdnem vegleges valtozat. Szepseghibaja, hogy ahogy eleri a szines levelekkel diszitett fa lombkoronat, teljesen osszezavarodik - ertheto modon - es bizonyos ponttol hasznalhatatlan a felvetel. De ha takarasmentes latomezom lett volna ( felhomentes egen), valoszinuleg vegig kovetheto lett volna a repulo nagy nagyitas mellett.
Miutan kivagtam a hasznalhatatlan reszeket, ime a vegeredmeny.
Pontosan ezzel a technikaval keszulnek az ISS-rol keszult kozeli videoim is. Termeszetesen nem en kovetem ennyire stabilan az Urallomast, szoftveres utomunka segitsegevel keszult. Ime egy pelda.
More and more people (gladly) are showing a growing interest toward ISS these days, probably because information about the overhead passes, transits are more accessible than ever before. And let's be honest, who wouldn't be interested in a spacecraft that us humans built, travelling 27,800 km/h, orbiting Earth at 400 km altitude 16 times a day.
When I first bought a scope for myself and became aware that there is this thing called ISS, I immediately thought to try to take an image of it. Than I've seen some of the best ISS photos on the web and I was immediately hooked. I wanted to do the same :)
The only way this could be done for beginners is manually moving the scope and hoping to capture a few useful frames.
Before you do anything outdoors, check what's happening, find details to know what you're dealing with (brightness, elevation, duration, etc.).
I normally get a pretty good summary of information from www.heavens-above.com. Here is a screenshot from the website about the ISS pass I've recorded.
Screesnshot from www.heavens-above.com
The only way you can achieve it is this:
First and probably most important step is to align my reddot finder/Telrad/finder (whichever you have) scope dead accurate with my main scope. It means wherever I'm pointing my Telrad, my main scope will have the same object centered in the eyepiece/camera/dslr. This is very very important, because due relatively high magnification a small error will result in not having ISS in your camera's field of view at all. Therefore all goes to bin....
I made this mistake a few times and was frustrated a lot :) But hey, mistakes are to learn from them right!
Once finder is aligned to scope, the second important thing is camera settings.
I can't give you any exact advises on that, every planetary camera/dslr has it's own sensitivity, therefore you have to find it out for yourself. Yes it means experimenting with your equipment. What I can give you is my experience at a given equipment.
Two ways of doing imaging. let's assume we are setting up for a very bright (between mag -2.5 and mag -3.5)
- Using a dslr camera. Depending on the dslr you're using, you can record video or take raw/jpeg photos on continuous mode. Usually for photos the settings I've used at very bright passes was shutter at 1/1250 and ISO at either 800 or 1600 (equipment 90/1250 maksutov + Canon 600D)
- Using a planetary camera. I personally use a Zwo ASI 120MC, settings usually and the settings on this particular attempt at mag -3.0 was: Shutter 0.800 and Gain 60 ( equipment 127/1500 maksutov + Zwo ASI 120MC color camera). (Update: My color camera is gone, instead I'll use a 120MM mono version from now on. The first shots are at the bottom of the post, taken through hazy sky.)
The rest of the job is determination, enthusiasm and a never giving up attitude :)
I used to use an equatorial mount for manually tracking ISS, but my experience is not the best with it. An Alt-Az mount or a dobsonian type scope is probably the best for this purpose.
Here is a video about how imaging works for me. Time lapse of 10s expos about the preparations and the pass itself.
Sometimes I've got comments like "nice CGI" or "green screen, fake" etc. Well I can not document the event better than this, if someone chooses not to accept that Earth is a globe (not flat) and things actually orbiting around it, I can't really argue any longer....
Have one of these apps:
- ISS Detector (android)
- Sputnik (iOS)
These two images below were taken with a Skywatcher 250/1200 Flextube scope on a dobson platform, that seems to have advantages by its built to follow ISS much easier, than doing the same with an equatorial of alt-az platform. Also a Zwo ASI 120MM mono camera was used to capture frames.
Taken with my new ASI 120MM monochrome camera
Japanese HTV-6 docked and a month later gone
The blog post will hopefully give you a good idea, how this is exactly done. It works for me and hope you might find it useful.
Good luck!! Best way to get good information about the overhead passes
One of the rear occasions, when ISS was crossing the disk of Sun twice in a week time and twice at near perfectly clear sky. From London! :)
For the first one it happened on the 17th of August - I had to drive up near M1 motorway. I did not have a scope with me sadly, I was working and just took a short break. Luckily I had my Canon 600D and a 75-300mm lens with me. At highest magnification, white light filter, this was the final result.
The second one ( 21st of August) was near Slough, sky was cloudy when I left home, but because ISS was only in a distance of 517 km, I decided to go whatever happens. You need to be in it to win it right :D
So packed up and hit the road. At my arrival to a randomly chosen location along the centerline clouds began to brake up and it was more a lightly scattered cloudy sky.
There was a patch of cloud 2 mins before the transit, but already saw that this might be really good to me as clouds were moving rapidly out of the way and clear spell was following afterwards. About half a minute before the transit it was bright and clear. Capture began and whooops there it was. A quick 0.68s transit.
Happy happy happy times.
Of course the last minute setting adjustment wasn't ideal, I should have had lower gain and higher shutter speed, the final result was a bit noisy. But it all does not matter. Every time I try to learn from my mistakes and let's not forget, an hour and a half before the transit, it all looked doom and gloom, so no room for complaining whatsoever...
Solar arrays are nicely visible
Here is a video about the whole project, the original and half speed transit video, screenshots of the predicted transit using CalSky.
Sometime in December 2015 I took a photo through my 200/1000 newton tube, when Mars was still far far away (248 million km away - angular diameter 4.9 arcsec) and it looked like a tiny reddish ball without any surface details.
Then in January I did the same project, only slightly but it was definitely bigger, still a whopping 241 million km away - angular diameter 5.8 arcsec.
Then the idea came, what if I am going to take a shot of the red planet whenever the weather allows me - to capture as it get closer and closer to Earth till it reaches it's closest. Looking back now, weather was crucial part of the project, I had to have a good few weeks of brake due extremely bad weather over UK.
In the meantime I changed equipment, decided to use my beloved 127/1500 maksutov tube with a Zwo ASI 120 MC color planetary camera and a TeleVue 2.5x powermate. Now I had 3750mm of focal length to deal with and it proved pretty useful for this purpose. The planetary camera's region of interest (ROI) was always the same 480x320, this is how I could guarantee the foundation of the proper comparison.
So the real project started on the 18th of April (2016), Mars was "only" 94 million km away from us and it's angular diameter at 14.2", more than double compare to January. Already showed quite some surface details - I was recommended to use WinJupos to find out what Mars is showing to me at a given time. It worked perfectly and later on, when the red planet was very close I could even identify certain features like Syrtis Major Planum or Olympus Mons.
Because I used two different tubes at the beginning, eventually I dumped the ones taken with the newton to avoid any confusions. But on this photo the size of the planets are roughly fine, adjusted by basic measurements.
The shots were taken absolutely randomly as weather was still very unpredictable. But still could manage to take a shot with no bigger gaps then two weeks. Mars just grew and grew all the way to a diameter of 18.6" at its biggest on the 27th of May.
Clear weather was just one thing, seeing, humidity and jet stream made me run for my money :) I had to wait till the 5th of June for the best of the season. I had the privilege to use my scope and give a try to a Celestron C9.25 SCT too. Here is the result....
Performance comparison of a Skywatcher 127 maksutov and a Celestron C9.25.
WinJupos screenshot in the middle
From that night here is a link to a gif I have made - gives a bit of a clue what would it feels like seeing any planet over the time as they rotate around their axis...
My plan was to keep doing it as long as possible. Visually Mars looked still very pleasing, definitely to the naked eye, less promising through a scope. So I had to came to the realization that the project is over now. Especially from the UK - even at its highest it was only 16° above horizon - far from ideal.
Having said that I am very pleased for the result, didn't even dream of having details on a scale like this. This is the final version so far, I might modify it somewhat in the future though :)
Tiangong-1 (literally: "Heavenly Palace 1") is China's first space station, serving as both a manned laboratory and an experimental testbed to demonstrate orbital rendezvous and docking capabilities. Launched unmanned aboard a Long March 2F/G rocket on 29 September 2011,it is the first operational component of the Tiangong program, which aims to place a larger, modular station into orbit by 2023.As of September 2011, Tiangong-1 was projected to be deorbited in 2013 and replaced over the following decade by the larger Tiangong-2 and Tiangong-3 modules. However, Tiangong-1 remains in orbit as of 2016. (source "Wikipedia") In my entire life I have seen this very space station onlythree times. Once in January during my visit to Gran Canaria. Unfortunately I didn't have my imaging equipment with me on that morning, so I saw it only visually. Sadly that was the end of the visible passes from that location.... Few days ago I realized Tiangong-1 will be visible from UK for a few days, will be at it's brightest on the 1st and 2nd of July. From my two attempts the first was a success, second a total failure...
I have used www.heavens-above.com website this time to find out the when, where from and the brightness details. The screenshot on the left gave me the basic reference points. My idea was to somehow capture it close to Mars, most ideal case transiting Mars (on the 2nd of July). But the experience I have gained during the 1st of July attempt made me change plans.
The Chinese Space Station is a difficult target after all. It only came as high as 16 degrees above the horizon, which means by the time I could image it due tree obstruction in front of my balcony, the distance between me and the station was around 1100-1250 km. The ISS would look smaller too at this distance, so being aware of this I used a radical equipment - SW 127 mak + TeleVue 2.5x powermate + ASI 120MC. This was a powerful setup, giving me a whopping 3750 mm of focal lenght.
That could have been pretty promising, but difficulties did not end here. Based on my experience on planetary imaging I was aware, the powermate will limit me a lot as it allows less amount of light to hit my camera's sensor than without. Adding this to the fact, that Tiangong brightened up only at a value of mag +3.0 which is very very faint compared to ISS ( good overhead passes are between mag -1.0 and mag -3.9).
My photo of Tiangong-1
I remember watcing back the footage I shot was an unpleasant feeling, because the station acted like a bright chewing gum on my screen. The problem lied in the settings, I guess video settings were quite underexposed. I did not have much faith, nearly deleted the footage straight away. Luckily I didn't :) After going through every single frame - I have found ONE single frame which showed me something only in my wildest dreams I dreamt of. I know it might be slightly squashed - mainly due poor seeing (wild jet stream at the moment) and the vast distance, especially the solar panels look squashes a bit. But hey, it's definitely there, the main body structure with the two solar panels on the sides. Already much much more that I have previously expected :P
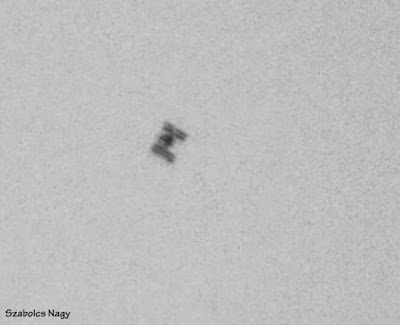
I have been planning this for some time now, but somehow did not have any luck with Sun and ISS these days. Today the predicted transit was about to happen at 12:35:28 from Wimbledon, United Kingdom.
Weather
The weather was splendid till about noon, when suddenly clouds began roll in, luckily scattered ones so looked like a good 50-50% success-fail ratio. Well just about 20 seconds after the transit, thin clouds obscured the Sun, but I was already very very happy by then :)
Prediction and details
I have used ISS Transit Prediction app, but wasn't 100% accurate (again), it gives an amazing estimate but to be fully sure about the exact path through the disk of Sun, I would recommend to use CalSky. Here is what the website said:
Centerline for the transit
CalSky shows the actual sunspots too, which helps to identify where ISS will enter and exit the disk of Sun
Equipment
The usual Skywatcher 127/1500 maksutov was my main tool to capture the transit of ISS (with a Zwo ASI 120 MC color camera), but for the second time the 0.5x focal reducer was a huge help, I could squeeze a 50-60% the disk of Sun in my FOV. The only mistake I made is that I didn't check CalSky, only the ISS Transit Prediction app and the expected path through Sun was slightly off from my expectations.
According to the app and my basic calculations, ISS should have gone through sunspot region 2536 and 2535, but ISS entered the disk above 2536 so missed a few frames sadly.
Conclusion: Always check CalSky.....