Wednesday 27 April 2016

Mars rotation - Saturn moon hunt

Mars


Living in London, but in general being on the northern hemisphere drives amateur astronomers to the obvious conclusion, that Mars and Saturn are way out of our reach, at least from a photographer's point of view., Mars crawls only 16°  above the horizon.  It is going to be like this for a while, so I stopped getting angry about it and decided to make the most of it.


Mars rotation


Early wake up today, weather report predicted clear sky over London, seeing wasn't the best but hey, who has any expectations in this town?? :)
So set the alarm for 2am, after 3 hours of sleeping I did my usual quick setup on my balcony.

Had to wait a little for Mars till I had a clear view on it. Focused on the Moon and started shooting. my first video was taken at 2:40am and the last at 3:31am.

I used my beloved Skywatcher 127/1500 maksutov tube, a TeleVue 2.5x Powermate with my ASI 120MC colour camera with settings like this:
- gain 65
- shutter 7.830

It amazed me how much this red planet rotated just under one hour duration.


Saturn

Mars and Saturn played hide and seek with the trees in front of me. When one was visible, the other one was obscured by the trees and the other way around. So at least I had time to spend on both without being rushed.

This was the original video I shot.....


This normally does not look promising, but I tried to get the best out of it using Autostakkert 2, Registax 6 and Photoshop. Saturn is at magnitude +0.2, so I had struggled with it compared to Mars (magnitude -1.3). It means that longer videos required for the same amount of frames as frame rate is lower due less amount of light hitting the sensor of the camera.

After processing this is my best, I could dig out some useful details.....


Also took a long video with more sensitive settings. It was quite challenging to capture any of them. The visual magnitude of the two moons were +9.0 (Titan) and +10.2 (Rhea).


And eventually these are all my Saturn shots I've ever took since I do astronomy. In a few years time this will be one of my best photos, if I can keep on taking shots every year...


Friday 22 April 2016

Mercury

Photo from WinJupos - as it looked on the 19th April
Mercury is the smallest planet in the Solar System and the one closest to the Sun, with an orbital period of about 88 Earth days, which is much faster than any other planet in the Solar System. Seen from Earth, it appears to move around its orbit in about 116 days. It has no known natural satellites. It is named after the Roman deity Mercurythe messenger to the gods.

On the 19th of April we had exceptionally great clear weather in London, no clouds and the atmosphere was calm. Because Mercury was nearly the farthest it can be from the Sun, it seemed like the perfect opportunity to take an image of it. 

I must admit, that my 127/1500 maksutov tube isn't probably the most suitable instrument for the job, but ever since I bought it keep surprising me with it's performance. Once again it happened.


Waiting for Mercury - equipment ready


Sunset was at 8:06pm, but a good 40 mins went past till I finally could spot it. Mercury's visual magnitude was only +0.4. The equipment was long ready for shooting, managed to get sharpness and the proper alignment of the main scope/red dot finder on Jupiter.
The photo at the beginning of this post is from WinJupos, a free software that can show current phases and the actual precise look of any solid body (does not work on gaseous planets as their surface change all the time). 

So I was looking for a crescent shape when I was looking for Mercury on the laptop screen. When I first found it, is was a big relief. Didn't really know what to expect... I must admit visually is wasn't the greatest, due it's low position on the sky made it look distorted and color dispersion was present as well, the blue and red was on the top and bottom separately.

I took a few videos, but knew time wasn't on my side as Mercury kept sinking lower and lower.
The first process of my video gave my this result.


The color does not match, but I'm not surprised at all. By the time I took my first video (at 20:48), Mercury was only 10° above horizon. Mainly this must be the reason, why not many of the amateur astronomers taking photos of it, very low and very small, not a good pain for sure.


My best image processing result is this one, saturation is set to nearly zero. I did a few reprocessing, did all the videos I've captured just to compare them. Reason is that black line close to north pole. First I assumed to be a stacking error, but after reprocessing all the other videos they show it too. So I only guess that must be surface detail, which still hard to believe with this size scope.


Thursday 21 April 2016

What a difference 3 days make around Plato crater?

Well we all know, that our closest celestial neighbour has phases and it constantly changing as it revolves around planet Earth. The illumination of it's surface shown to us increases and decreases day by day, but the way to actually see how dramatic this change is if we take a photo of the same area with a few days difference.

The photo below is a composite of two shots, one was taken on the 16th April and the other on the 19th April.
They show roughly the same area - Mare Imbrium mainly. The dominant crater on this two photos is Plato, between Mare Imbrium and Mare Frigoris, left form Montes Alpes.
But Aristoteles, Eudoxus, Archimedes and Aristillus craters are also quite exquisite features.

See how surface details "fade away" as Sun gets higher in the sky (if you were on Moon). Because no shadow present, the whole surface becomes pretty pale and harder to make up fine details.
Most likely that's the reason, why terminator (the dividing line between lit and unlit areas) is the most interesting target for observers. It you slowly move your scope alongside it, fantastic surface details can be observed, such as craters, mountains, valleys, seas etc.


Monday 18 April 2016

ISS transiting the Moon - experiment on reducer


Hunting for ISS is a tiring task, needs lots of passion and enthusiasm for sure.
I still did not forget the disappointment of two missed transit on Jupiter within the last week or two but I don't give up that easy. I realized that the app that predicts transits (called ISS Transit Prediction for android only) can be set to alarm you about the coming up event.

Well yesterday 25 mins before the pass my alarm went on. Sky was clear so did a very very quick setup and 5 mins before the pass I was all ready to capture the moment. 


Equipment 


Skywatcher 127/1500 maksutov scope on an eq5 mount. Teamed up with a Zwo ASI 120 MC colour camera, but if I only insert the camera, it will give me a very small 
field of view (FOV) - no surprise, that's what planetary cameras are 
designed for.
I used exactly this setup yesterday
So lately I spent a little amount of money on a no name 0.5x focal reducer to roughly half the focal length of my scope. 

 
It gave me a pretty good FOV and I don't need to sacrifice the
resolution or the clarity of the photo. This proved to be an excellent
setup for this purpose, planning to use it fot the Mercury transit as well.


Preparations


I use ISS Transit prediction app (only for android), but if I really want good accurate info, I visit CalSky website. They showed me the following information:


Proper description of the transit

Transit path on the map - zoomable on the website

This photo shows where ISS will appear relative to Moon's surface


Exposure


My ASI camera definitely does not like daylight, every time I had to deal with imaging in daytime it is just a bit of a pain. But in Fire Capture you can change the amount blue colour (Wblue) - otherwise the whole Moon will be just blue. But that little option helped to find a right(ish ) colour balance.

Main parameters:Gain                        18
Shutter                     0.747ms

Histogram               29%
ROI                         1280x960
FPS (average) =       26


Only strange thing I've noticed is that most likely my laptop memory couldn't keep up with the data flow, so it kept missing frames. It happened to me before, but not on a scale like this. You can see the photo below, I could even squeeze my name in the gap, at least a good 3-4 frames were dropped. Also it occurred one more time, when ISS was at the Mare Nectaris/Mare Fecunditatis area. But it is what it is, I personally can't do anything with it, only a laptop/camera update will help. Not a major issue at the moment :)


Result


Links

The photo above without the enlargement, but zoomable
https://www.flickr.com/photos/metrolinaszabi/26214830000/in/dateposted-public/


Thursday 14 April 2016

ISS once again - lower trajectory

Every time when ISS appears on a lower trajectory - this was 47 degrees I believe - we have a unique way to see it. Instead of standing under it, we see it from a side angle too.

I used a my 127/1500 mak to capture this video.


I just love as it turns over and giving us a great view :) I had to watch it a few time to figure out, which way it is facing and turning toward. 


Also my favorite is part of the time lapse video, when something suddenly brightens up. I recon it must be the solar arrays on the docked cargo vehicles - as we have a few park to ISS (Dragon, Cygnus, Progress). This was the very first time I recorded anything like this :)


Sunday 10 April 2016

International Space Station (ISS) followed by Dragon spacecraft (CRS-8)


The history in space exploration is being written everyday, two days ago another success was achieved. Most likely everyone meet the news here or there, SpaceX successfully landed the first stage of the Falcon rocket onto a floating platform. 


We rarely see from London, if a cargo ship begins its hot pursuit to catch up with ISS. Well not this time ;)
I do image ISS from time to time, first I used a SW 200/1000 newtonian scope with a Canon 600D, then a SW Skymax 90/1250 maksutov and now a 127 maksutov teamed up with a Zwo ASI 120MC planetary camera. It is giving me a bit of a hard time as I struggle to find good settings with an ASI camera.

Setup is ready, wonderful sunset at the background
Anyway I went to a nearby open park to gain some more experience on how to capture ISS, every attempt gives me further reference points, what gain and shutter I should use. I knew Dragon might be visible, but probably only for the camera lens, not to my eyes.

So did my setup, waited for ISS to appear and began shooting my video. Below here is my best shot if the station, panels are reflecting a little amount of light, mainly the truss, the coolers, Columbus and Kibo labs, Zvezda, Zarya and Unity and Destiny parts are visible. 


International Space Station (ISS)


I kept my 600D clicking (with a Samyang 8mm fisheye lens on it) whilst I was busy with the ISS close up. I knew (from spotthestation.nasa.gov website) that Dragon will follow ISS within about a minute gap behind. But honestly I did not expect it to get as bright as it was.


ISS, Drgaon, Jupiter and Moon


So I stopped recording ISS, quicky set gain higher and started pointing my scope toward the Dragon spacecraft. I didn't know what to expect, I've never attempted to image such a small object travelling quite quickly. Here are the best two frames, One looks spherical (on the left) - similar to the front end of the cargo ship. But still pretty unsure what part of it is illuminated, sadly the solar panels remained hidden. I was hoping that at least those will be illuminated, which could make the identification a lot easier for sure. 


Dragon (CRS-8) cargo supply spacecraft


Courtesy of  SpaceX


Wednesday 6 April 2016

De-rotated Jupiter

After reading a few astronomy related forums on the web, I had to realize that some planetary imagers actually do de-rotation on Jupiter image processing.
It got stuck in my head and was planning to play with the idea a bit.

Last night we were gifted in London with a superbly clear sky, so it seemed like a perfect opportunity to try this new idea out.

So I took one 5 mins long video - yes 5 minutes!! :) The golden rule is we never go over 90 sec because of the planet's rotation. But using WinJupos you can break this rule. Like everything, this method has advantages and also disadvantages too.

On the bight side it gives more details and an overall better looking to our final image. The picture below clearly represents the huge difference between a stacked image in a regular way from a 90 sec video and the one from a 5 mins long video. 


comparison of de-rotated and simply stacked images


If I have to mention any downside of this processing method is probably the less sharp edges. That is an obvious result as the planet rotates, we can only "enhance" the middle region. But I am already convinced by WinJupos, with some careful post processing it makes the end result look more pleasing, more detailed and maybe smoother too.


Method

I cut off a 1000 frames chunk out of the whole video, ideally somewhere from the middle area and stacked it in Autostakker 2 (AS2!).
Then opened up WinJupos and made a measurement file from the stacked photo I just created form that 1000 frames.
Then open "Tools" in menu and "De-rotation of video streams"....
Open the original video and add the measurement file to the requested section. Basically that's it. You run the process and once you've got the de-rotated video, you stack it as you would normally do in AS2!. 

Sunday 3 April 2016

Imaging ISS -part 1 (with dslr)

This is a subject that has a growing popularity these days - which is a great thing. The International Space Station is not only the most expensive project we've ever built, but it hosts countless important experiments and gives us an accurate feedback, what is it like to live in a microgravity, how things, materials act in space, etc.
Since I discovered it's "existence" I am a huge fan of the ISS. If weather permits, I always go outside and follow it just with naked eye -  every time I see it - even these days - I am still super fascinated.

Since I own a telescope and saw some of the photos of professionals such as Thierry Legault - I had that inner feeling that I should attempt to do the same.

At the beginning I used my Skywatcher 200/1000 newtonian scope on an eq5 mount - not ideal mount for this purpose but with a little practice it is feasible... Also for imaging a Canon 600D did the job. Was a bit confused which way to go, taking images or videos and use the frames.
I've tried both with mixed results, but I must say single RAW images proved to be the way forward if you use dslr. Unfortunately London does not treat me with too many clear skies, especially when ISS comes so the opportunities to practice are rare.

If you try and fail, well fear not, you're not alone :) It is a very challenging way of imaging a fast moving, very small object in the sky. Need lots of practice, accuracy and lots of patience. But when you nail it - well you'll be the happiest person on the globe at that very moment :D

Where to start?

This is the most important question of all for sure.
I would say these are the most important steps you need to do before you even thinking about pressing the dslr shutter release button:

-  Most importantly download any of the smartphone apps (ISS detector for android and Sputnik for iOS), these apps will tell you the brightness of the station, where it is coming from (from UK always west or south west), the elevation (how high it climbs up in the sky), at what time and how long the whole event will last. Crucial to have these information!! If you use pc mostly, then open http://www.heavens-above.com/ or https://spotthestation.nasa.gov/ and it will tell you accurately the same info.

-  Once you know when and where to look, do you setup as you would. The only difference is that you won't track the sky this time, you don't need polar alignment or such. Instead try to position you mount so, that you can track the path of the station the smoothest by moving the scope manually. Using the app on field and knowing the elevation of the ISS, it should be straight forward.
Mind that ISS is the closest when it passes nearly ahead!

-   I always track the station MANUALLY. Yes by moving with hand. I'm sure this whole process could be motorized, some enthusiasts build their own equipment. Sadly I'm not a technical guy, definitely not some who does DIY too often, so I rather track ISS manually and do the rest with help of dedicated software.

-  Finder scope and the main scope need to be aligned, so whatever you see in the finder should appear in you main scope. You do this first visually, than you insert your dslr and do the alignment again. At this point I should state, that I don't really look through the finder scope, I found it way to hard to keep ISS in the finder's FOV. Instead I rather stick with red dot finder / Telrad (I use Telrad), it proved to be a better and more efficient way to me. But you need to find out which way works for you the best.

- To set camera settings and focus, another crucial step. If one of this two is set incorrectly, all your frames will end up in the bin. Check the max brightness of the station (visual magnitude) and try to find something similarly bright on the night sky. I use normally whatever I can, Moon or planets. If non of these present, than find the brightest star, check it's brightness and do and estimate with you settings. On my 200/1000 with a 2x barlow inserted, at mag -3.0 (or near) - my settings were normally ISO 800 or 1600 with sutter at 1/1250 or the nearest up or down in your settings (on a Canon 600D). These settings only apply if you shoot RAW images. Video settings are slightly different.... best to do a few experiments on that, mind that you should use high shutter rate - otherwise ISS will trail like stars on long exposure shots, we don't want that.

Okey these are the main steps, if any of these above are set wrong - the punishment will come... probably that's why this task is so hard, very easy to do a small mistake and it's over. Few times I did all the setup required, few minutes before the pass I double checked sharpness ( to do so I changed shutter speed to see the star and focus on it). But I got busy checking the app and other stuff, so I simply forgot to put the shutter speed back to where it supposed to be set. I let you guess what happened afterward... angry me. :)

Tracking

Manual tracking is the way forward for most of us. If everything is dead accurately aligned, you start following ISS by looking through your finder / red dot finder / Telrad (any of these, whichever works for you the best). It will give you sweaty moments I can guarantee, but it is so much fun.
You don't need to worry about your camera, as long as ISS is in the FOV it will be recorded by your dslr. Some keeps pointing the scope a bit before the ISS on the sky and let ISS fly through the FOV - I personally always try to track it, so basically moving the scope with ISS.
You'll need a remote shutter release (cable preferably), set your dslr on continuous mode.
My Canon 600D isn't capable of reading images as quickly onto the SD card as higher end cameras. What happens is basically after taking 10(ish) shots, clicking will pause (camera needs time to write those photos onto the SD card) and it won't continue at least for a few more seconds. Than it starts again but soon it will need some time again because the RAW files are simply too big. My camera just can't keep up with the writing speed. It is really annoying, because you loose precious time when ISS is bright and close, but the camera keeps hesitating...
So probably that is the reason why I went down to another road, using planetary camera and a laptop - but that will be the subject of another blog post :)


Here are some of the early photos I took. You'll see how my skills got better over the time. But I sill love one of my first shots which looks like a bunny on ski :D


Another way to photograph ISS is using the camera (dslr) and a wide(r) angle lens. Taking multiple shots set to 5/10/15/20/30 sec shots and layer them in Photoshop or GIMP.
Maybe a bit less challenging but with a nice background you can make a fantastic composite photo (see photos below).

Taking RAW images


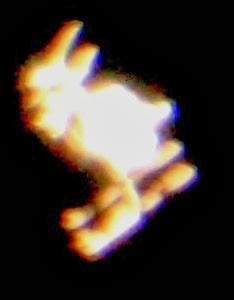
My very first ISS image - the Rabbit :)
(2013.06.08)


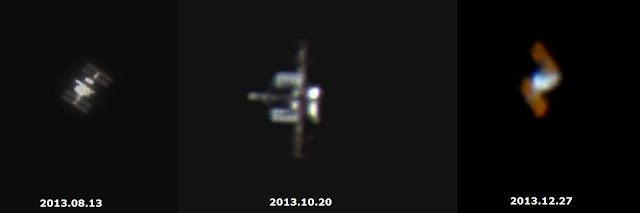
Slow improvement after a few attempt


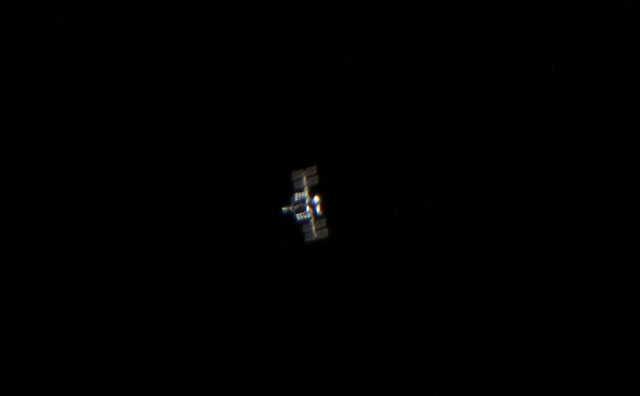
One of my ISS shot using a Canon 600D
(2014.10.19)


Using video frames


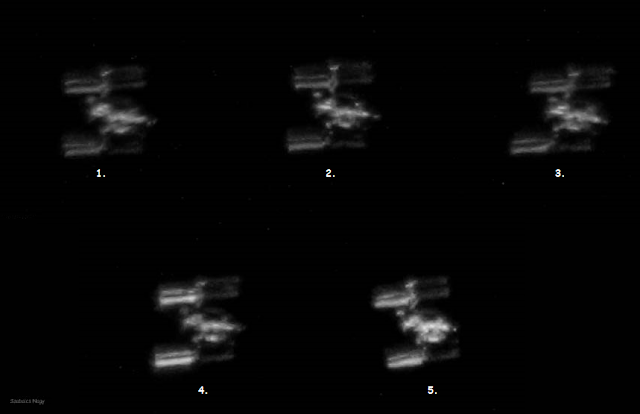
Few frames of a video
(2015.08.01)


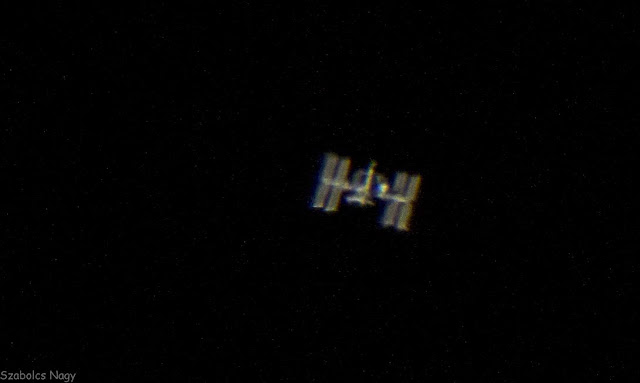
Quite a few features visible - possibly a docked Progess too
(2015.08.09)


Composite photos


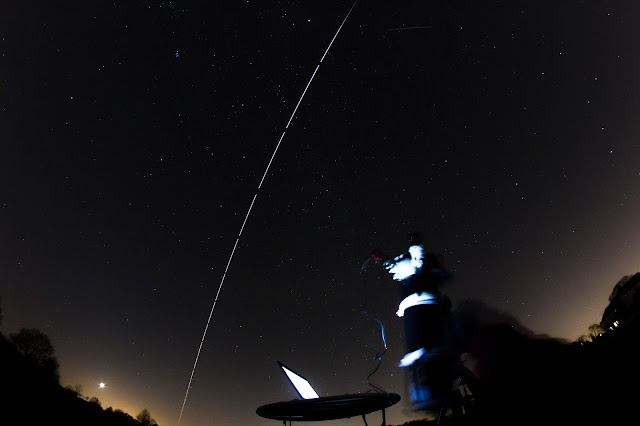
Composite ISS over head pass whilst I was taking close up photos
(2016.02.10)


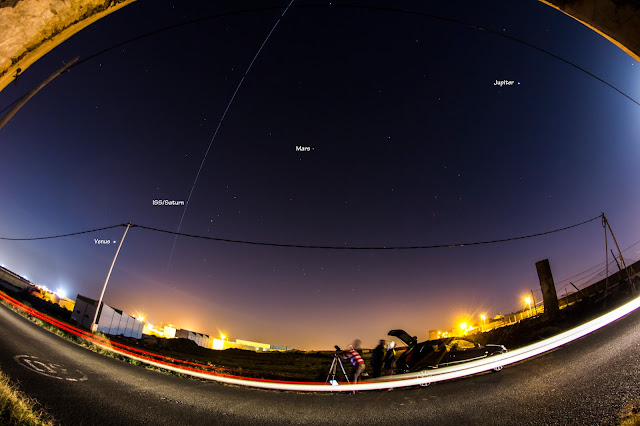
ISS transiting Saturn - captured through an 8mm Samyang fisheye lens


Photos

All my ISS photos are here
https://www.flickr.com/photos/metrolinaszabi/albums/72157649038551639/with/19818768563/


Friday 1 April 2016

Jupiter imaging - Skywatcher 127/1500

Last night I visited the Northolt Branch Astro amateur group, we got together to do our hobby, imaging the wonders of heaven.
As I only do imaging from my balcony, due laziness and lack of trust in my power tank - so this was a great opportunity to test my Skywatcher 127/1500 maksutov scope.

I recorded 6751 frames, histogram at 52%, gain 79 and shutter 17.36 ms.  I must admit that mostly I stick with a value around 40%, but yesterday I was in an experimental mood... did not regret it at all.

The best 3500 frames, because seeing was quite okey and the quality of the frames seemed good too. I have tried stacking the best 1500, 2500 and 3500 frames. The third option turned out to be the way forward.


After stacking in Autostakkert 2


Final result

Still lots to do with the photo. In Registax I used Wavelets to get the right sharpness, getting rid of the false colour and align the RGB channels. Bit of gamma modification and save.
Then in Photoshop it only needed a final touch to fine tune the details.
Io was getting closer to Jupiter and the actual occultation happened at 22:20, 20 mins after this shot was taken.


Jupiter in motion - 4 frame animation 


Overall conclusion:
Skywatcher 127/1500 mak is a stunningly good scope under good seeing conditions (seeing was 4 and 2 according to meteoblue - that website gives two values for seeing, max is 5 in both categories).
Hard to find the exactly good settings, but once you do it does miracles - mind this is still a fairly small scope.

It does embarrass bigger scopes for sure :)

Location

London - Northolt

Equipment used
Skywatcher 127/1500 MC
Zwo ASI 120 MC colours camera
Celestron 2x X-Cel barlow lens

Software used for processing:
Autostakkert 2
Registax 6
Photoshop


Update


In WinJupos I attempted to do derotation of three stacked images, here is the result compared with the best single frame (stacked of course as described above).
One stacked frame has probably slightly more details, but in the same time noise is a bit too much. Versus the derotated version - less details but probably more pleasing to look at it.